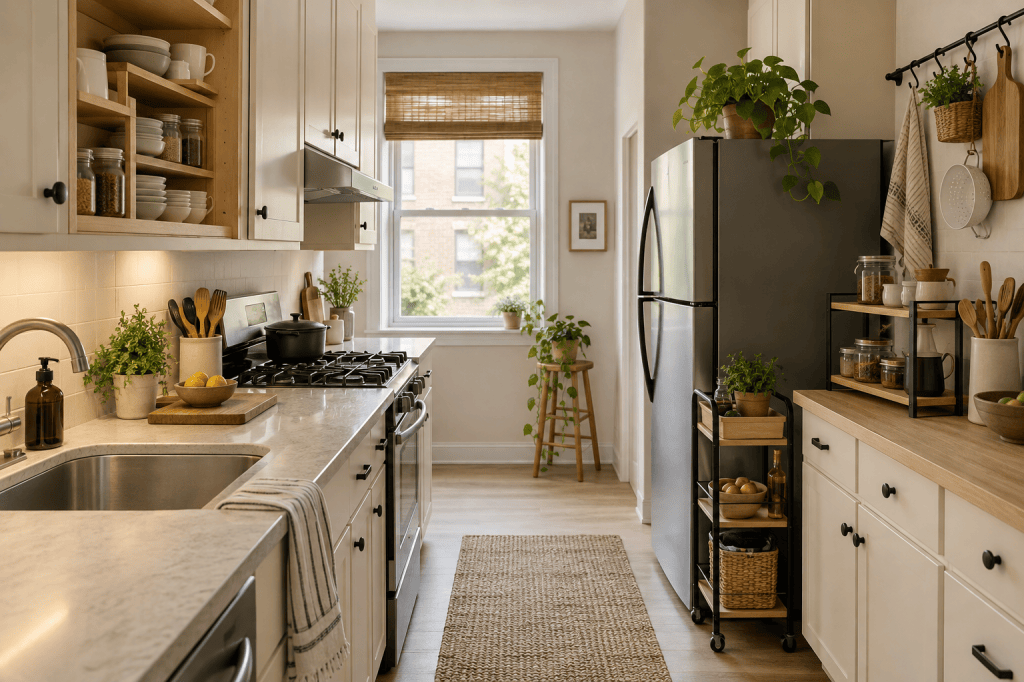
A small rental kitchen does not need to hold everything a large kitchen can hold. It needs to make the things you use most easy to reach, easy to return, and easy to live with. The best improvements usually come from using the space inside cabinets more deliberately, adding one or two reversible organizers, and resisting the urge to cover every open surface.
By The Small Standard Editorial Team · September 2026
The ideas below are designed for apartments where drilling, replacing cabinetry, or making permanent changes may not be allowed. Always check your lease before attaching anything, follow the organizer’s stated weight limit, and test removable adhesives in an inconspicuous spot. A renter-friendly solution should leave both the kitchen and your security deposit intact.
Editorial note: The room images in this guide are AI-assisted visualizations created to demonstrate the storage principles described. Product-specific installation and weight guidance should always take precedence.
At a glance
| Problem area | Best first move | Measure before buying |
|---|---|---|
| Wasted cabinet height | Shelf riser | Interior height and hinge clearance |
| Narrow refrigerator gap | Rolling cart | Front, back, baseboards, and handle swing |
| Deep cabinet | Handled pull-out bin | Usable depth and door opening |
| Under-sink clutter | Two removable bins | Pipes, disposal, and cabinet opening |
| No drawer space | Door organizer or small hooks | Door and shelf clearance |
1. Measure the kitchen before buying organizers
Begin with a tape measure, not a shopping cart. Record the usable width, depth, and height of each cabinet, including the space taken up by hinges, pipes, shelf supports, and door frames. Measure narrow gaps at both the front and back because walls and appliances are not always perfectly square.
Then remove anything expired, duplicated, or rarely used. Organizers make access easier, but they cannot make an overcrowded cabinet function well. Knowing what remains—and where it is used—will tell you which storage additions are genuinely necessary.
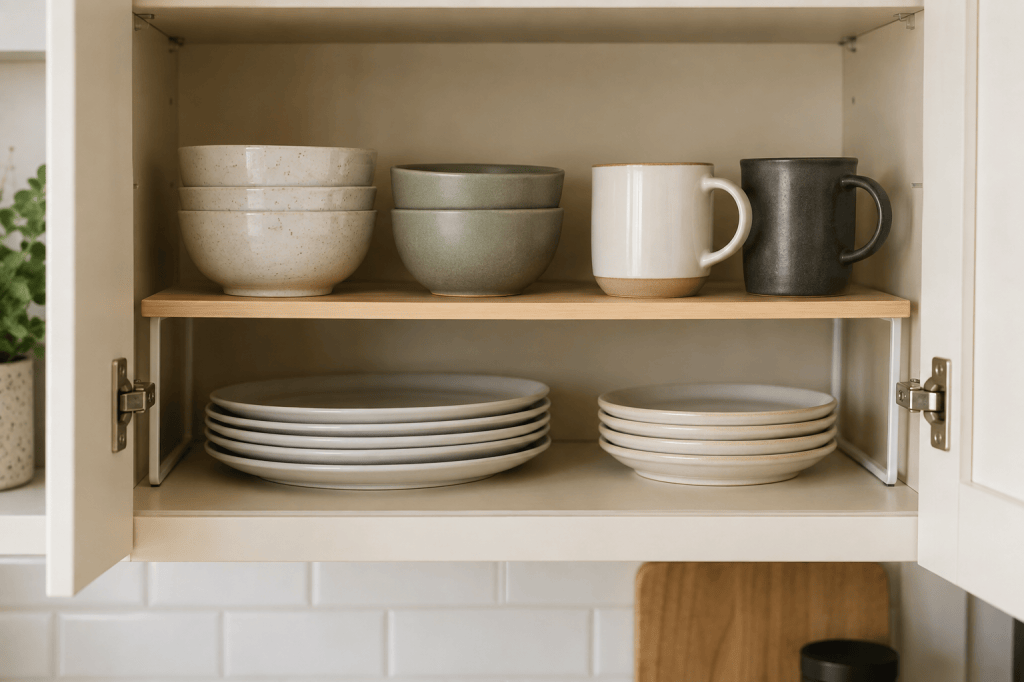
2. Add a second level with shelf risers
A cabinet shelf often has unused air above short stacks of dishes, mugs, or pantry jars. A freestanding shelf riser creates another level without screws or permanent hardware. Use the lower level for plates or everyday ingredients and the upper level for lighter pieces that are comfortable to lift.
Choose a riser that leaves room to remove items without tilting them awkwardly. A slightly narrower riser is usually more useful than one that fills the cabinet wall to wall, because the open space beside it can hold taller objects.
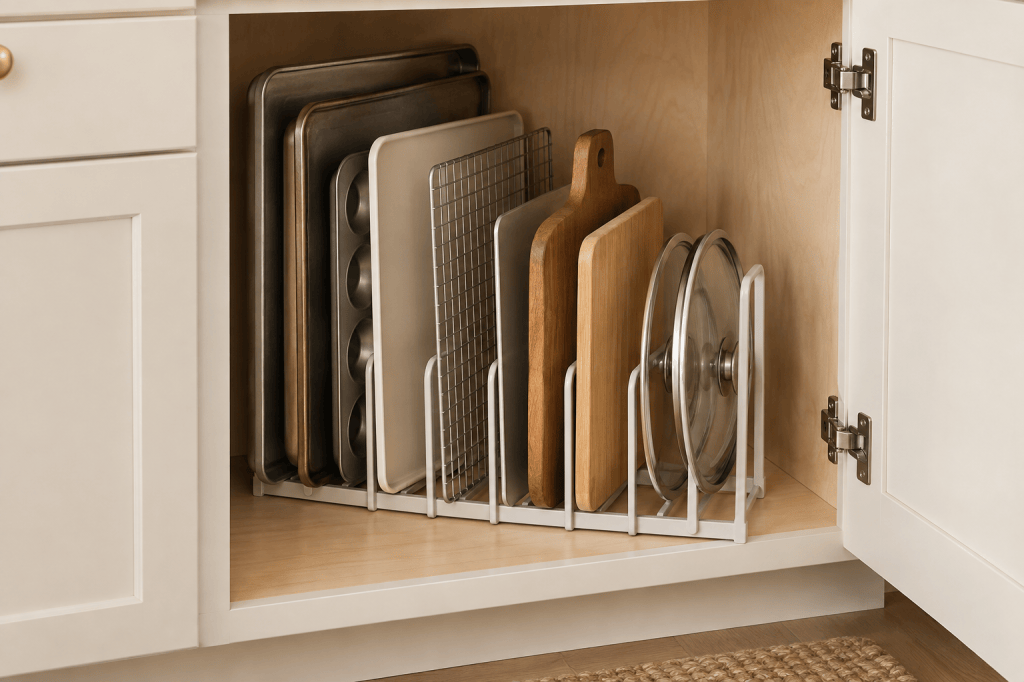
3. Store baking sheets and lids vertically
Flat items become difficult to use when they are stacked horizontally. A removable file divider or sturdy tension divider can keep baking sheets, cutting boards, cooling racks, and pot lids upright. You can take one item without lifting an entire pile, and the arrangement uses cabinet height more effectively.
Place the divider in a lower cabinet where tall pieces can be handled safely. Keep heavier pans close to the cabinet wall and make sure the divider cannot slide when an item is removed.
4. Use an over-door rack for lightweight overflow
If the pantry or kitchen door has enough clearance, a slim over-door rack can hold packets, wraps, reusable bags, tea towels, or other light supplies. It adds capacity without occupying the counter or floor, and it can move with you.
Measure the door thickness and the gap above it before buying. Open the door fully to check nearby walls and handles, and avoid loading the rack with glass jars or heavy cans. If the hooks cause rubbing or prevent the door from closing normally, choose another location rather than forcing it.
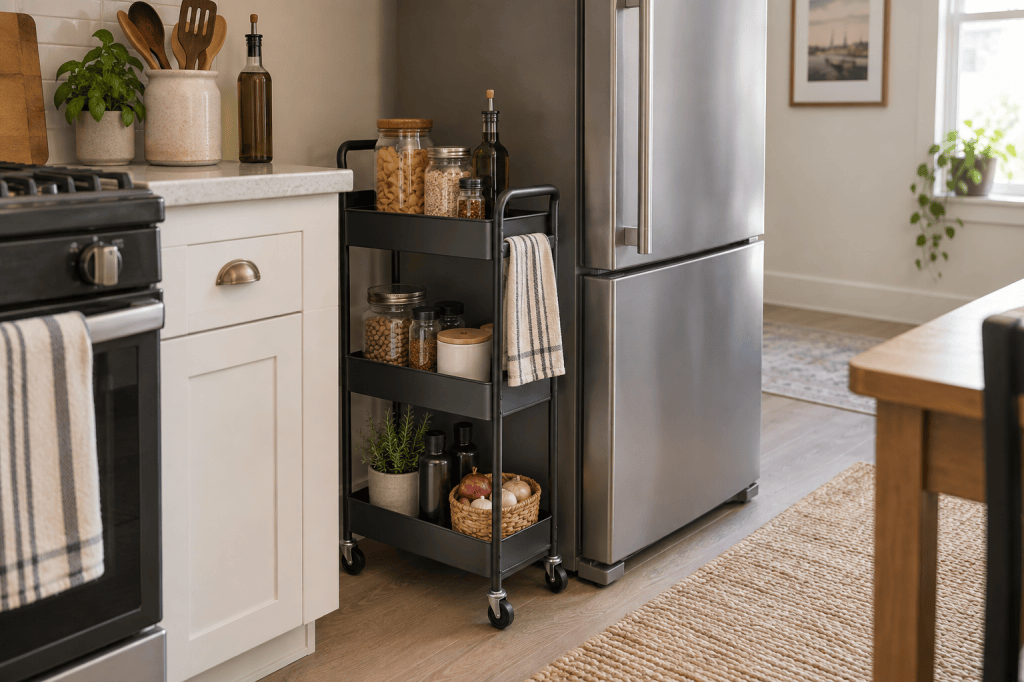
5. Fit a slim rolling cart into a narrow gap
The space beside a refrigerator or at the end of a cabinet run may be wide enough for a narrow rolling cart. Use it for one defined category—such as breakfast ingredients, baking supplies, or everyday pantry staples—so it does not become miscellaneous overflow.
Measure around baseboards, appliance handles, and uneven walls, then leave enough clearance for the cart to roll out easily. Raised edges help keep containers stable. A handle is especially useful once the cart is loaded.
6. Create a small freestanding counter shelf
A compact counter shelf can make use of vertical space around coffee supplies, cooking oils, or frequently used bowls. Unlike a wall shelf, it requires no drilling and can be repositioned when your routine changes.
Keep it away from the sink splash zone and the heat around the stove. Limit it to items used often; a counter shelf filled with decorative extras simply turns vertical space into visible clutter. Confirm that appliances beneath or beside it still have the ventilation recommended by their manufacturers.
7. Use the inside of a cabinet door
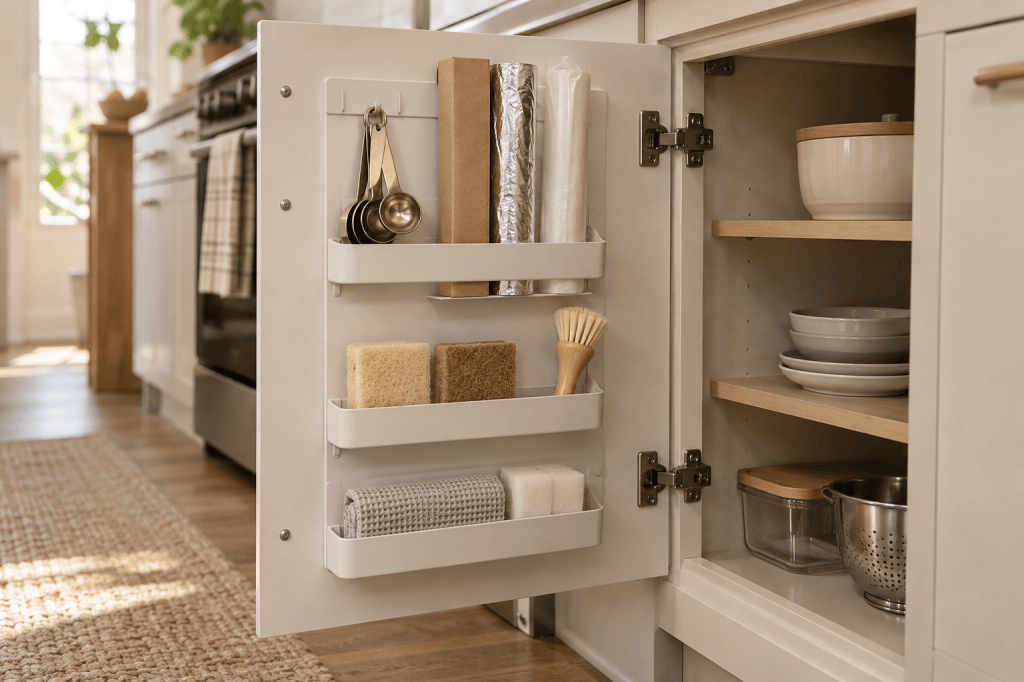
The inside of a cabinet door can hold shallow, lightweight essentials: measuring spoons, foil or parchment rolls, spare sponges, or a small dish brush. Removable adhesive hooks and low-profile pockets work best when they are matched carefully to the surface.
Before attaching anything, hold the organizer in place and close the door slowly. Check that it clears the shelves, dishes, and hinges. Painted or laminated finishes can react differently to adhesive, so follow the removal instructions and avoid exceeding the weight rating.
8. Organize beneath the sink around the plumbing
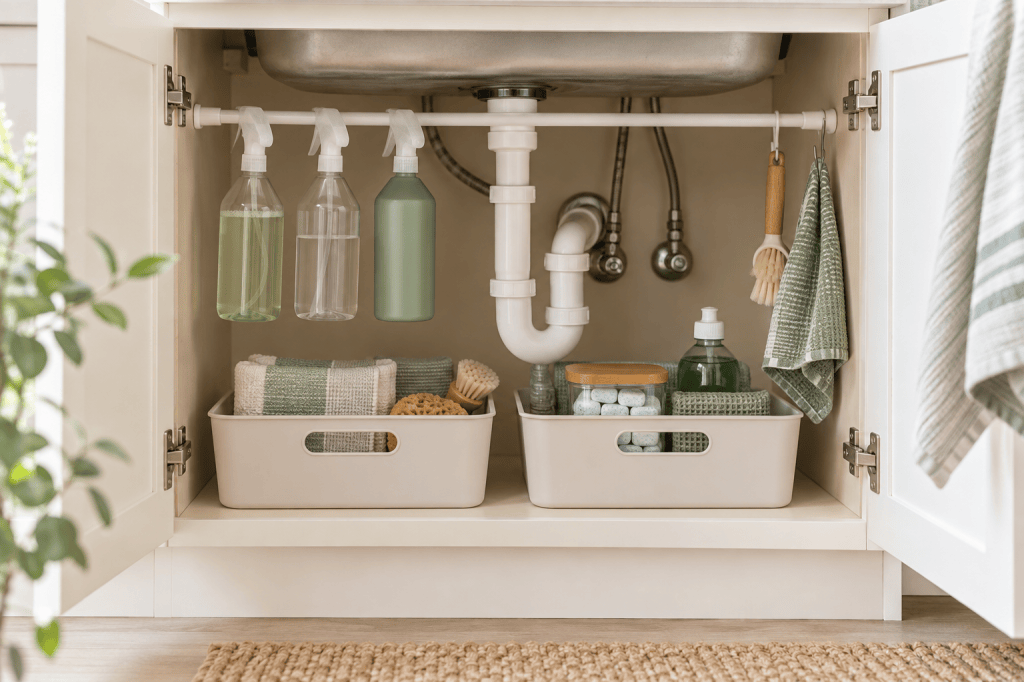
Under-sink storage works best when the plumbing remains visible and reachable. Use two handled bins rather than one deep container: one for dishwashing supplies and another for cleaning cloths or replacement sponges. A small tension rod can hold lightweight spray bottles by their triggers, provided it is secure and does not press against a pipe.
Keep chemicals in their original containers, follow every safety label, and never combine products. If children or pets can reach the cabinet, use appropriate locked storage; the U.S. Consumer Product Safety Commission’s poison-prevention guidance is a useful safety reference. Leave enough open space to notice moisture or a leak early.
9. Add removable hooks only where they solve a routine
A few well-placed removable hooks can keep oven mitts, measuring cups, or a lightweight towel within reach. Place them near the task they support rather than filling every empty side panel. One hook beside the prep area is more useful—and visually calmer—than a scattered collection around the room.
Clean and prepare the surface exactly as directed, respect the curing time, and reserve adhesive hooks for light objects. Knives, glass cookware, cast iron, and anything positioned above a person or cooking surface require a more secure solution.
10. Use the side of the refrigerator carefully
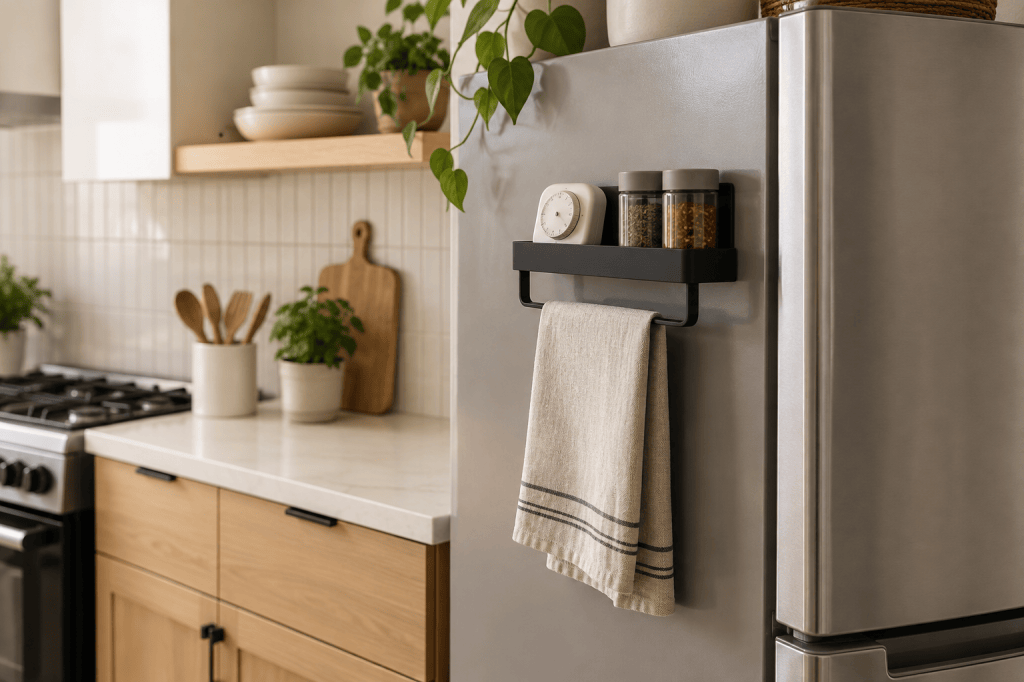
If the refrigerator manufacturer permits magnets on the exterior and the side is exposed, a slim magnetic rack can hold a timer, small towel, or a few light pantry items. This can be useful in a kitchen with almost no drawer space.
Do not cover ventilation openings, crowd the door seal, or place heavy glass containers where they could fall. Appliance surfaces vary, so confirm both magnetic compatibility and the manufacturer’s clearance requirements before adding storage.
11. Reserve high spaces for light, infrequent items
The top shelf of a cabinet—or the space above cabinets when it is safely accessible—can hold lightweight pieces used only occasionally. Think spare linens, picnic supplies, or an empty serving basket rather than heavy appliances.
Avoid storing food near heat and grease, especially above the stove or refrigerator. Use stable containers with easy-to-grip handles, and never create a setup that requires balancing on a chair. If you cannot reach the space safely with a proper step stool, it is not useful storage.
12. Make deep shelves behave like drawers
Deep shelves become easier to use when handled bins turn each category into a simple pull-out drawer. Group baking supplies, snacks, or back-stock together, and choose bins short enough to clear the cabinet opening without scraping the shelf above.
Square or rectangular containers usually use shelf space more efficiently than round ones. Stack only pieces designed to stack, and choose sizes that fit the food you actually purchase. Decant only ingredients you buy consistently, and keep cooking directions, allergen information, and expiration details whenever they matter.
13. Organize by frequency, not by appearance
Give the easiest positions to the things used every day. Daily dishes belong at comfortable hand height. Weekly appliances can sit lower or slightly higher. Seasonal tools can occupy the deepest shelf. This simple hierarchy is more valuable than arranging the kitchen to look perfect when every door is open.
Notice where items naturally land during cooking and cleanup. If something is repeatedly left on the counter, its assigned home may be too difficult to reach. Adjust the system to support the routine you already have instead of expecting a complicated organizer to create a new one.
How to keep an organized kitchen from feeling crowded
- Keep at least one useful section of counter visually open.
- Repeat a limited palette of finishes and container styles.
- Use closed cabinets for packaging and visually busy supplies.
- Group tools by task instead of spreading duplicates around the room.
- Remove something before adding another organizer.
A small kitchen feels larger when the main work surfaces remain usable. Storage should support cooking and cleanup, not become another display that has to be maintained.
Frequently asked questions
How can I add kitchen storage without drilling?
Use freestanding shelf risers, vertical dividers, slim rolling carts, handled bins, over-door racks, tension rods, and carefully chosen removable hooks. Measure first and follow every surface and weight requirement.
Are adhesive hooks safe for kitchen cabinets?
They can be appropriate for light objects when the adhesive is compatible with the finish and removed exactly as directed. Test an inconspicuous area first. Do not use them for knives, glass, heavy cookware, or items positioned above heat.
What should I store on top of the refrigerator?
In many kitchens, nothing. Heat and ventilation requirements can make the top of a refrigerator a poor storage location. Consult the appliance manual and preserve the required clearance. If storage is permitted, limit it to light, heat-tolerant items in a stable container.
How do I organize a small kitchen with very few cabinets?
Keep the equipment list edited, give daily items the easiest positions, and add capacity in one concentrated area with a rolling cart or freestanding shelf. Avoid scattering many small organizers across the walls and counters.
A useful kitchen begins with fewer obstacles
The goal is not to squeeze the maximum amount into every cabinet. It is to remove the small frustrations that make cooking and cleaning harder: the lid buried beneath a stack, the spray bottle lost behind a pipe, or the counter crowded with things that have no clear home.
Start with one problem area and make the smallest change that solves it.
Continue reading
Small, well lived.
 The Small Standard
Response
[…] If the kitchen is your next problem area, continue with 13 Small Kitchen Storage Ideas for Renters—No Renovation Required. […]
LikeLike